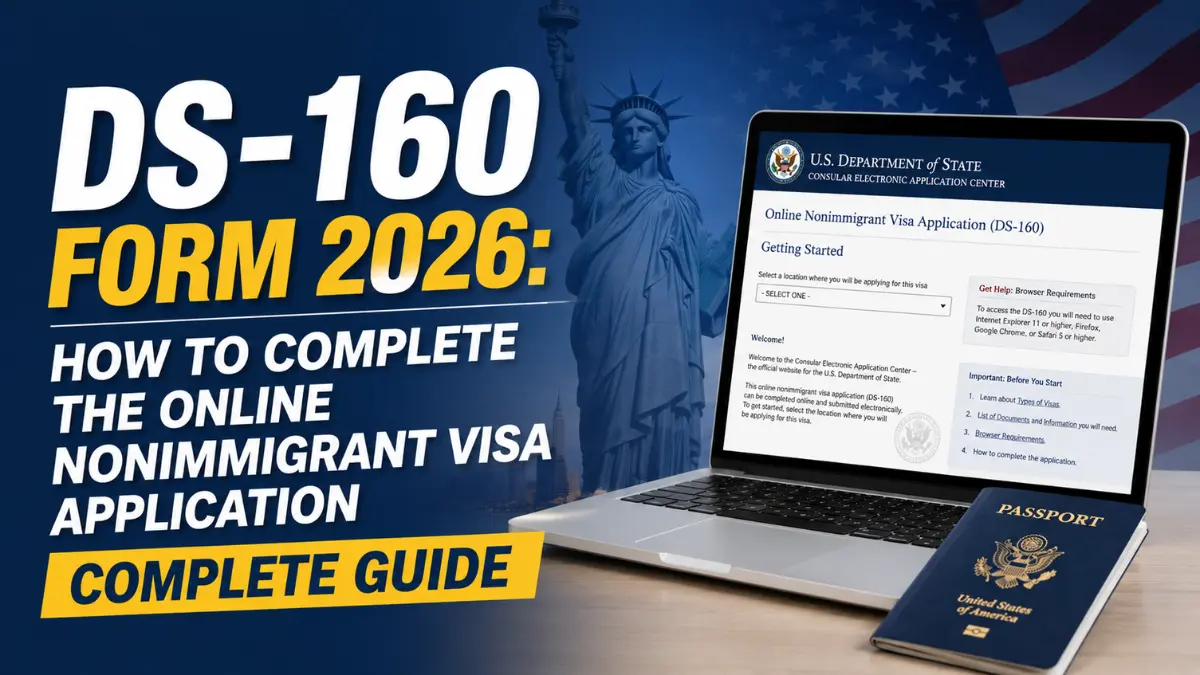
If you are applying for a temporary U.S. visa from outside the United States, the first and most important step in your application is completing the DS-160 form — the Online Nonimmigrant Visa Application. Whether you are applying for a tourist visa, a student visa, a work visa, or a fiancé(e) visa, you cannot schedule a U.S. embassy or consulate interview without a submitted DS-160 confirmation number. And once submitted, the form cannot be edited — every answer you enter is locked in and reviewed by a consular officer before your interview.
This complete guide covers everything you need to know about the ds 160 online nonimmigrant visa application in 2026: what it is, who must complete it, how to access it through the CEAC portal, how to fill out each section correctly, the photo requirements, the new social media disclosure rules, the confirmation barcode page, and the most common mistakes that can cost you your visa.
Also on applicationformportal.us: DS-11 Form — How to Apply for a New U.S. Passport and DS-82 Form — How to Renew Your U.S. Passport by Mail. A valid passport is required before you begin your DS-160.
What Is the DS-160 Form?
📥 Access the DS-160 Online Application at ceac.state.gov →
The DS-160, officially titled the Online Nonimmigrant Visa Application, is the standardized electronic form issued by the U.S. Department of State and required for virtually every nonimmigrant (temporary) visa category. It is submitted exclusively online through the Consular Electronic Application Center (CEAC) at ceac.state.gov — there is no paper version. A printed DS-160 is never mailed or faxed; the form is completed and submitted entirely within the CEAC system.
Consular officers use the information you enter on the DS-160 — together with your in-person interview — to evaluate your eligibility for a U.S. nonimmigrant visa. The form collects your personal background, travel history, employment details, family information, and responses to security-related questions. Because all U.S. embassies and consulates worldwide use the same DS-160, it ensures that every applicant is assessed consistently regardless of where in the world they apply.
There is no fee to complete or submit the DS-160 itself. However, most visa categories require you to pay a separate Machine Readable Visa (MRV) processing fee before you can schedule your interview appointment. The MRV fee amount varies by visa category and country.
Who Needs to Complete the DS-160?
Every individual applying for a U.S. nonimmigrant visa from abroad must complete their own DS-160, including children of any age. Parents or guardians may complete the form on behalf of a minor child, but each applicant — adult or child — must have a separate DS-160 submission. Common visa categories that require the DS-160 include:
- B-1/B-2 — Business and tourist/visitor visas
- F-1 and M-1 — Student visas for academic and vocational programs
- J-1 — Exchange visitor visas
- H-1B, H-2A, H-2B, H-4 — Specialty occupation, agricultural, temporary non-agricultural, and dependent work visas
- L-1 — Intracompany transferee visas
- O-1 — Extraordinary ability visas
- K-1 and K-3 — Fiancé(e) and spouse of U.S. citizen visas
- E-1 and E-2 — Treaty trader and investor visas
- P visas — Athletes, artists, and entertainers
Two important exceptions: citizens of Visa Waiver Program (VWP) countries traveling to the United States for 90 days or less for tourism or business do not use the DS-160 — they apply through the ESTA system instead. And applicants for immigrant visas (green cards through consular processing) complete Form DS-260, not the DS-160. K visa applicants are a notable exception — despite involving a path to permanent residence, K-1 and K-3 visa applicants complete the DS-160.
DS-160 vs DS-260: What Is the Difference?
Understanding the ds-160 vs ds-260 difference is important so you do not file the wrong form. Both are State Department online applications filed through the CEAC portal, but they serve completely different purposes:
| Feature | DS-160 | DS-260 |
|---|---|---|
| Purpose | Nonimmigrant (temporary) visa | Immigrant visa (green card via consular processing) |
| Visa types | B, F, H, J, L, O, K, E, P and others | Family-based, employment-based, DV lottery |
| Filed through | CEAC NIV portal | CEAC IV portal |
| Intent | Temporary stay in the U.S. | Permanent residence in the U.S. |
| Fee | No filing fee (MRV fee required separately) | Immigrant visa processing fee required |
Before You Start: What You Need
The CEAC session times out after 20 minutes of inactivity with no warning. If your session expires, any unsaved data is lost. To avoid this, gather everything before you open the application. Here is what you will need:
- Your current passport (number, issue date, expiration date, issuing country)
- A compliant digital passport photo (see photo requirements below)
- Your complete travel history for the past five years — every U.S. trip with arrival and departure dates, plus international travel
- Your U.S. point of contact — a name, address, and phone number for a person or organization in the United States (employer HR contact, hotel, relative, or friend)
- Employment history for the past five years (employer names, addresses, job titles, dates)
- Your education history
- Family information including parents’ names and your spouse’s details (if applicable)
- Social media handles for all platforms used in the past five years (see social media section below)
- Visa-specific documents: F-1 students need their SEVIS ID from Form I-20; H-1B applicants need their petition receipt number; J-1 applicants need their DS-2019 program sponsor details
Write down your Application ID the moment it appears on the CEAC screen. This 10-digit number is your only way back into a saved application. Save after every section using the on-screen Save button — do not rely on autosave.
How to Access the DS-160 on CEAC
Knowing how to access the ds-160 application CEAC correctly is the first step. Here is how to start:
- Go to ceac.state.gov and click on the “Nonimmigrant Visa” section.
- Select the U.S. Embassy or Consulate where you plan to attend your visa interview. This determines which post processes your application.
- Click “Start an Application.”
- Choose a security question and write down your answer immediately.
- Your Application ID is generated on the next screen. Save it right away — screenshot it, email it to yourself, or write it down. You cannot access your saved application without it.
- Upload your photo. The system runs an automatic compliance check. If the photo fails, you can either fix it or skip the upload and bring a printed 2”×2” photo to your interview instead.
- Complete all sections of the form, saving after each one.
- Review, sign, and submit.
If you need to pause and return later, go back to ceac.state.gov, select your embassy, click “Option C — Retrieve Application,” and enter your Application ID along with your security question answer.
How to Fill Out the DS-160: Section by Section
The DS-160 consists of approximately 21 sections and takes most applicants 60 to 90 minutes to complete if all documents are ready. Here is a walkthrough of the key sections and where applicants most commonly make mistakes:
Step 1: Personal Information
Enter your full name exactly as it appears on your passport — character for character, same order, same spelling including hyphens and special characters. Your surname should match the machine-readable line at the bottom of your passport photo page. Enter your date of birth, country of birth, city of birth, and all nationalities you currently hold. If you hold dual nationality, list both. If your passport has a separate “Passport Book Number,” enter it; if your country’s passports do not have this field (Indian passports, for example), select “Does Not Apply.”
Step 2: Travel Information
Enter your intended date of arrival in the United States, your expected length of stay, and your U.S. address during your visit (hotel name and address is acceptable for tourists; employer address for work visa applicants). Provide the name and contact details of your U.S. point of contact. Be specific — “sightseeing” is not an adequate purpose of travel for a B-1/B-2 visa; describe your specific plans.
Step 3: Travel/Visit History
List every previous visit to the United States with arrival dates, departure dates, and length of stay. If you have visited five or more times in the past five years, you may indicate this rather than listing each trip individually. Be honest — overstays, entries without inspection, or any immigration violations must be disclosed here. USCIS and CBP records will be cross-checked at the interview.
Step 4: U.S. Contact
Provide the name, address, and relationship to you of your U.S. point of contact. For H-1B and L-1 applicants, this is typically your sponsoring employer’s HR contact. For B-1/B-2 tourists, it can be a hotel, a business contact, or a friend or relative you are visiting. Do not leave this section blank.
Step 5: Family Information
Enter your parents’ full names and whether they are U.S. citizens or permanent residents. Provide your marital status and, if married, your spouse’s full name, date of birth, nationality, and place of birth. List all immediate family members who are U.S. citizens or permanent residents.
Step 6: Work and Education
Provide your current employer’s full name and complete, verifiable address. Consular officers sometimes verify employer addresses; do not list a P.O. Box or an incomplete address. Include your job title and monthly salary. List your highest level of education, your school or university name, and the course of study.
Step 7: Security and Background Questions
This section contains five groups of yes/no questions covering communicable diseases, criminal history, drug trafficking, terrorist activity, and prior immigration violations. Most applicants answer “No” to all questions — but read each one carefully. One critical area of confusion: “Have you ever been refused a U.S. visa?” A 221(g) administrative processing refusal counts as a visa refusal and must be answered “Yes.” A USCIS petition denial (for example, an H-1B petition denial) does not count as a visa refusal. Prior deportation, removal, or unlawful presence must also be disclosed.
Step 8: Visa-Specific Sections
Depending on the visa category you select, additional sections will appear. F-1 and M-1 students must enter their SEVIS ID number from their Form I-20 — copy this directly from the document, one wrong digit can trigger administrative processing delays. J-1 applicants provide their program sponsor details from their DS-2019. H-1B and other petition-based work visa applicants enter their I-797 petition receipt number.
Step 9: Social Media Information
The DS-160 asks for all social media usernames/handles you have used in the past five years across a list of specified platforms. This includes deleted or deactivated accounts — omitting them can be treated as misrepresentation. As of 2026, the ds-160 social media requirements 2026 have expanded: applicants for F, M, J, H-1B, and H-4 visas are required to set all social media profiles to public or open privacy settings prior to their interview so consular officers can conduct vetting. Officers cross-reference your posts against your DS-160 answers. An Indian student received a 221(g) for failing to list a Reddit account. Take this section seriously.
Step 10: Review, Sign, and Submit
Before submitting, the CEAC system generates a full review page showing all your answers. Read every line carefully. Once you click Submit and enter your passport number and security question answer to electronically sign the form, you cannot make any changes. The electronic signature carries the same legal effect as a handwritten one. If you discover an error after submission, you must start a completely new DS-160 application.
DS-160 Photo Requirements
The ds-160 photo requirements are strict and the CEAC auto-checker rejects many photos. Here are the key specifications set by the U.S. State Department:
- Size: 2” × 2” (600 × 600 pixels minimum, 1200 × 1200 pixels maximum)
- Format: JPEG only
- Background: plain white or off-white
- Your face must be centered and cover 50–69% of the image
- No glasses (eyeglasses are not permitted in U.S. visa photos as of 2016)
- Neutral expression, mouth closed
- No head covering (except for religious reasons, with a signed statement)
- Photo must have been taken within the last six months
- No filters, edits, or digital alterations
If your digital photo fails the CEAC auto-check, you have two options: fix the photo and re-upload, or skip the upload and bring a printed 2”×2” photo to your interview instead. Many consulates accept a printed photo at the interview window. A passport photo service at a pharmacy or photo studio typically costs under $20 and produces a compliant image file. The State Department also offers a free online photo cropping tool that can adjust sizing and dimensions.
The DS-160 Confirmation Number and Barcode Page
After you successfully submit your DS-160, the CEAC system immediately generates a confirmation page containing a unique 10-digit ds 160 confirmation number barcode. This barcode page is one of the most critical documents in your entire visa application. Here is what you need to know:
- Print it immediately. Save a digital copy and print at least two physical copies. You are required to bring the printed confirmation page to your visa interview — without it, you will not be admitted to the appointment.
- The confirmation number must match your appointment. When you schedule your visa interview, you enter your DS-160 confirmation number. The barcode number on your confirmation page must match the one associated with your interview. If you later submit a new DS-160 (to correct an error), you must reschedule your appointment with the new confirmation number, or bring both confirmation pages to the interview (as required by the December 2025 policy update).
- If you lose your confirmation page, retrieve it at ceac.state.gov by selecting your embassy, clicking “Option C — Retrieve Application,” and entering your Application ID. You can reprint the confirmation page at any time using your Application ID.
- No need to print the entire form. You only need the confirmation barcode page — not the full application. The consular officer accesses your full application electronically through the barcode.
After Submitting: What Happens Next
Submitting your DS-160 is the beginning of the visa process, not the end. Here is the sequence of steps after submission:
- Print your DS-160 confirmation barcode page immediately.
- Pay the MRV fee through your country’s specific payment portal (typically ustraveldocs.com or an equivalent country site). The fee varies by visa type: the B-1/B-2 fee is $185, the F/M/J fee is $185, the H/L/O/P fee is $205, and the E visa fee is $315 as of 2026. Note: as of February 2026, a new $250 Visa Integrity Fee has been authorized under the One Big Beautiful Bill Act but has not yet been implemented at consular posts — check the State Department fee schedule for updates before your appointment.
- Schedule your visa interview at the U.S. embassy or consulate. You will need your DS-160 confirmation number and your MRV fee payment receipt.
- Gather supporting documents relevant to your visa type (passport, photo, I-20 for students, I-797 for H-1B workers, employment letters for B-1/B-2 applicants, financial evidence, etc.).
- Attend your interview. Bring your printed DS-160 barcode page, your passport, your MRV fee payment receipt, your appointment confirmation, and all supporting documents.
The ds-160 processing time visa interview 2026 varies enormously by country and visa category. B-1/B-2 visa interview wait times at some U.S. consulates in high-demand countries such as India, Mexico, and Brazil exceed several months. F-1 and H-1B applicants at many posts have shorter wait times due to specialized appointment slots. Always check the current wait time at your specific embassy or consulate on the State Department website before planning your travel.
DS-160 for B-1/B-2 Tourist Visa Applicants
The ds-160 for B1 B2 visa tourist is the most common DS-160 application. B-1/B-2 visitors must demonstrate nonimmigrant intent — that is, they must show strong ties to their home country and a clear intention to return after their U.S. visit. Consular officers assess this during the interview, but the DS-160 itself contributes to this assessment. Specific tips for B-1/B-2 applicants:
- In the “Purpose of Trip” field, be specific. State exactly what you plan to do: “Visit New York, Washington D.C., and Los Angeles as a tourist for 14 days” is better than “tourism.”
- Your U.S. point of contact should be a hotel, specific business, or host who can be verified.
- Be accurate about your employment and salary. Consular officers use this to assess your economic ties to your home country.
- If you have previously visited the U.S. and departed on time, list all those trips — a clean travel history strengthens your application.
Common DS-160 Mistakes That Can Cost You Your Visa
- Name mismatch with passport. Your name on the DS-160 must match your passport exactly. Even a missing hyphen or middle name discrepancy can cause problems at the interview window.
- Not disclosing prior visa refusals. A 221(g) administrative processing refusal is a visa refusal and must be declared. Failing to disclose it is misrepresentation under INA section 212(a)(6)(C)(i) — a permanent bar from the United States.
- Wrong SEVIS ID for F-1 students. Copy the SEVIS ID directly from your I-20 — one transposed digit triggers administrative processing delays that can push back your start date.
- Missing or incomplete social media disclosure. All platforms used in the past five years must be listed, including deleted accounts. Omission is treated as misrepresentation.
- Using the browser Back button. Always use the form’s own navigation buttons. Using your browser’s back button can corrupt your session and lose data.
- Not saving your Application ID. Without your Application ID, you cannot retrieve a saved application. There is no recovery option if you lose it before submission.
- Not printing the confirmation page. You cannot attend your interview without the printed barcode page. Print multiple copies as soon as you submit.
- Submitting on unstable internet. A dropped connection during submission can result in a failed submission without a confirmation page. Use a stable, private internet connection.
- Inconsistencies between the DS-160 and supporting documents. Consular officers compare your DS-160 answers to your passport, employment letters, and other documents. Unexplained discrepancies raise red flags.
Can I Edit the DS-160 After Submission?
No — once submitted, the DS-160 is permanently locked. You cannot make any changes to a submitted application. If you discover an error after submission, you must complete and submit an entirely new DS-160 from scratch (though the CEAC system allows you to retrieve your submitted application and use it to pre-fill a new one, which saves significant time). After submitting a new DS-160, bring both confirmation pages to your interview if you have already scheduled an appointment using the old confirmation number, or reschedule your appointment using the new confirmation number.
DS-160 for Families
Every member of a family applying for U.S. visas must have their own separate DS-160, including infants and young children. The CEAC system includes a “Create a Family Application” feature after you submit the first family member’s DS-160. This feature pre-fills shared information such as travel plans, destination, and U.S. contact into a new application for the next family member, saving time when processing multiple applications.
Other Application Forms You May Need
Depending on your visa type and immigration journey, you may also need these related forms:
- DS-11 — Application for a New U.S. Passport: A valid U.S. passport is required before you start your DS-160. If your passport has expired or you need a first-time passport, file DS-11 first.
- DS-82 — U.S. Passport Renewal by Mail: If your U.S. passport is expiring, renew it with DS-82 before starting your DS-160 so your passport details are current.
- Form I-485 — Application to Register Permanent Residence: If you are already in the United States on a nonimmigrant visa and wish to apply for a green card without leaving, this is the form you need instead of consular processing.
- Form I-765 — Employment Authorization Document: Certain nonimmigrant visa holders in the U.S. (H-4, F-1 OPT, J-2) may be eligible to apply for a work permit using this form.
- Form I-130 — Petition for Alien Relative: If a U.S. citizen or permanent resident family member is sponsoring you for an immigrant visa rather than a nonimmigrant visa, the process starts with Form I-130.
Frequently Asked Questions About the DS-160 Form
Is there a fee to complete the DS-160?
No. The DS-160 form itself is free to complete and submit. However, most visa categories require a separate Machine Readable Visa (MRV) processing fee, which must be paid before you can schedule your interview. The MRV fee is non-refundable regardless of whether your visa is approved or denied.
Can I save my DS-160 and finish it later?
Yes. The CEAC system allows you to save your progress and return later using your Application ID and security question answer. Saved applications expire after 30 days. The session times out after 20 minutes of inactivity, so save after every section and write down your Application ID before you step away.
Do I need a new DS-160 for a visa renewal?
Yes. Every nonimmigrant visa application — whether it is a new visa or a renewal of an existing visa — requires a new, separate DS-160 submission. You cannot reuse a previous DS-160.
What happens if I make a mistake on my submitted DS-160?
You cannot edit a submitted DS-160. You must submit a completely new application. For minor errors, many consular officers will note the correction in the system if you inform them at the interview. For significant errors (wrong visa category, wrong passport number, wrong name), always submit a new DS-160 before your interview and bring both confirmation pages.
How long is the DS-160 valid after submission?
A submitted DS-160 does not have a strict expiration date, but most embassies expect the form to have been submitted within the past 12 months. If significant time passes between submission and your interview, or if your circumstances have changed substantially (new employer, new address, changed marital status), submit a new DS-160 reflecting your current information.
Do children need their own DS-160?
Yes. Every applicant, including infants and young children, must have their own separate DS-160 submission. Parents or guardians complete the form on the child’s behalf. Use the CEAC “Create a Family Application” feature after your first submission to pre-fill shared travel information for each child’s application.
Does ESTA replace the DS-160?
No. ESTA (Electronic System for Travel Authorization) is a completely separate system for citizens of Visa Waiver Program countries traveling to the United States for 90 days or less without a visa. If you are eligible for ESTA, you apply through the official ESTA website — not through ceac.state.gov. The DS-160 is only for applicants who need a traditional nonimmigrant visa from a U.S. embassy or consulate.
Official Resources
- 🔗 Complete the DS-160 Online — CEAC Portal (ceac.state.gov)
- 🔗 State Department DS-160 Official Page
- 🔗 U.S. Visa Photo Requirements — State Department
- 🔗 U.S. Visa Appointment Wait Times by Country
- 🔗 U.S. Visa Application Fees (MRV Fee Schedule)
Disclaimer: This guide is for informational purposes only and does not constitute legal advice. Visa rules, fees, and processing times change frequently. Always verify current requirements on the official U.S. Department of State website at travel.state.gov and at the website of the U.S. embassy or consulate where you will apply before beginning your DS-160.